
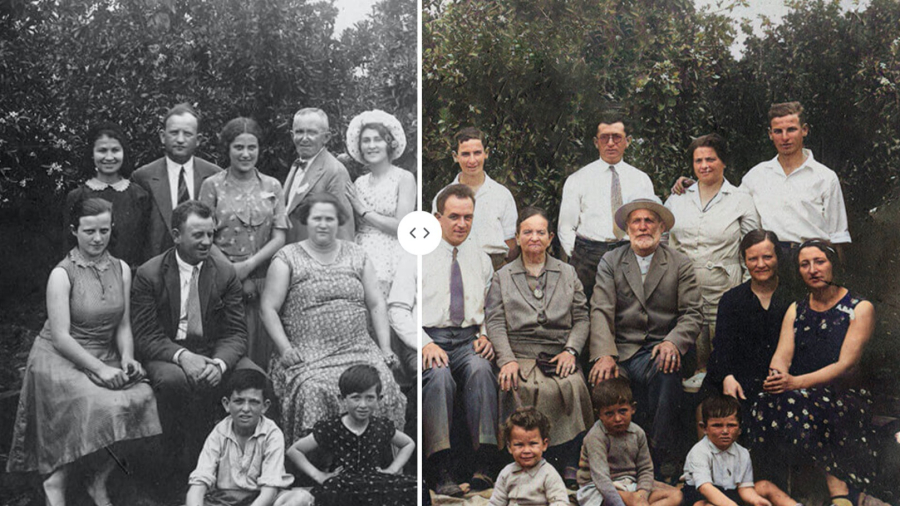
Have you ever wondered how black and white photos transform into vibrant, colorized images? The secret lies in the groundbreaking use of Artificial Intelligence (AI) in photo editing software. This guide will take you through the exciting process of using an AI – colorized photo to make what once seemed like a complex task simple and accessible for everyone.
Table of Contents
Understanding AI in Photo Colorization
The process of colorizing photos has been revolutionized by AI technology. AI photo editing software uses advanced algorithms to add colors to black-and-white images intelligently. This technology understands the nuances of color and applies them to the right places in the photo, making the colorization process faster and more accurate.
AI interprets the different elements in the photo, such as skin tones, landscapes, and textures, and then applies the most realistic colors based on a vast database of color information.
Choosing the Right AI Photo Editing Software
The first step in colorizing a photo with AI is choosing the right software. Look for software that specifically mentions AI capabilities in colorization. A good AI photo editing tool should offer user-friendly features, accurate colorization, and flexibility in editing options. It’s important to consider the software’s ease of use and the level of control over the colorization process. Some software might even provide presets or templates that can be a good starting point for beginners.
Preparing Your Black and White Photo
Before you begin the colorization process, preparing your black-and-white photo is important. Ensure the image is clear and free of any major blemishes. The quality of the original photo can significantly affect the outcome, so starting with a good-quality image is key. Use basic photo editing tools to adjust your black-and-white photo’s brightness, contrast, or sharpness before you start the colorization process.
Starting the Colorization Process with AI
Once your photo is ready, upload it to your chosen AI photo editing software. Most AI tools will have a straightforward option to colorize the image. The software will analyze the photo and use its AI algorithms to apply colors that best fit the scene and objects within the photo. This process is usually automated, but some tools may allow user input to guide the AI, especially in complex images.
With Adobe tools, you can “Add color to your black-and-white pictures with the Colorize Neural Filter.”
Fine-Tuning Your Colorized Photo
You can make further adjustments after the AI has applied colors to your photo. Most AI photo editing software will allow you to tweak the saturation, brightness, and contrast. Some software also provides options to change specific colors if they don’t look quite right. This step is crucial for achieving a natural and authentic look, especially in areas where the AI might not have perfectly matched the colors.
Saving and Sharing Your Colorized Photo
Once you’re satisfied with the colorized photo, save it in your desired format. AI colorized photos can be saved in various formats like JPEG or PNG. Your newly colorized photo is ready to be shared with friends, family, or social media. It’s also a good idea to save the original black-and-white photo and the colorized version for comparison or future use.
AI photo editing software has made the art of colorizing photos a simple and enjoyable task. By following these steps, anyone can breathe new life into old black-and-white photos, experiencing the magic of AI in transforming memories into colorful images. The world of photo editing is evolving rapidly with AI, and colorization is just the beginning.